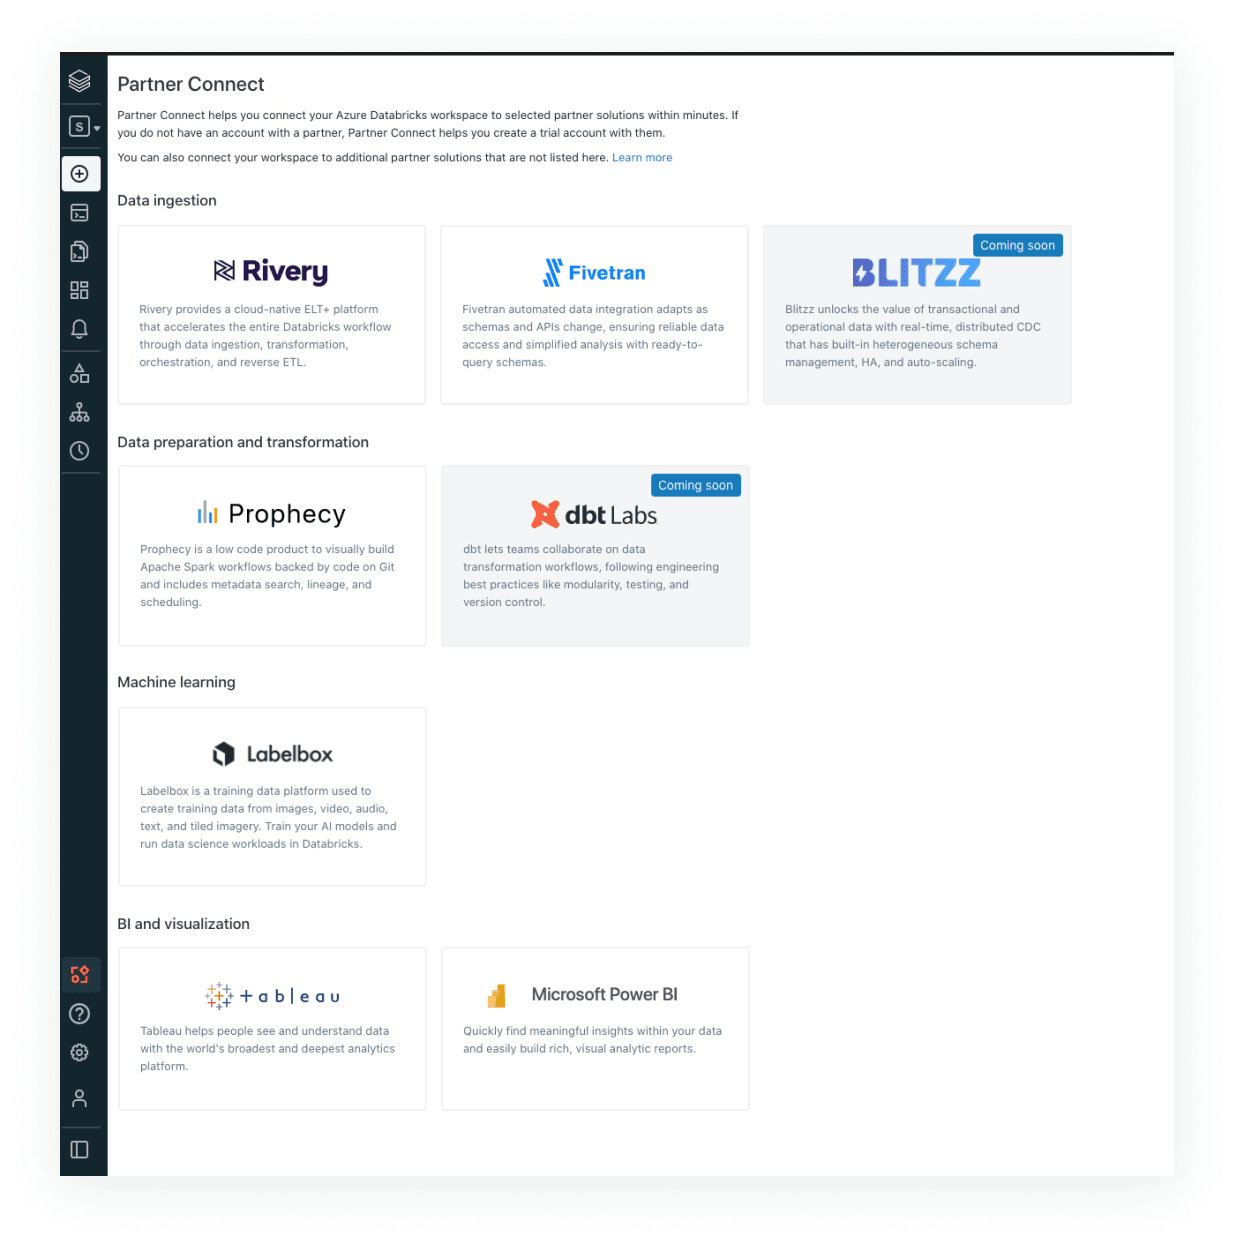
Partner Connect

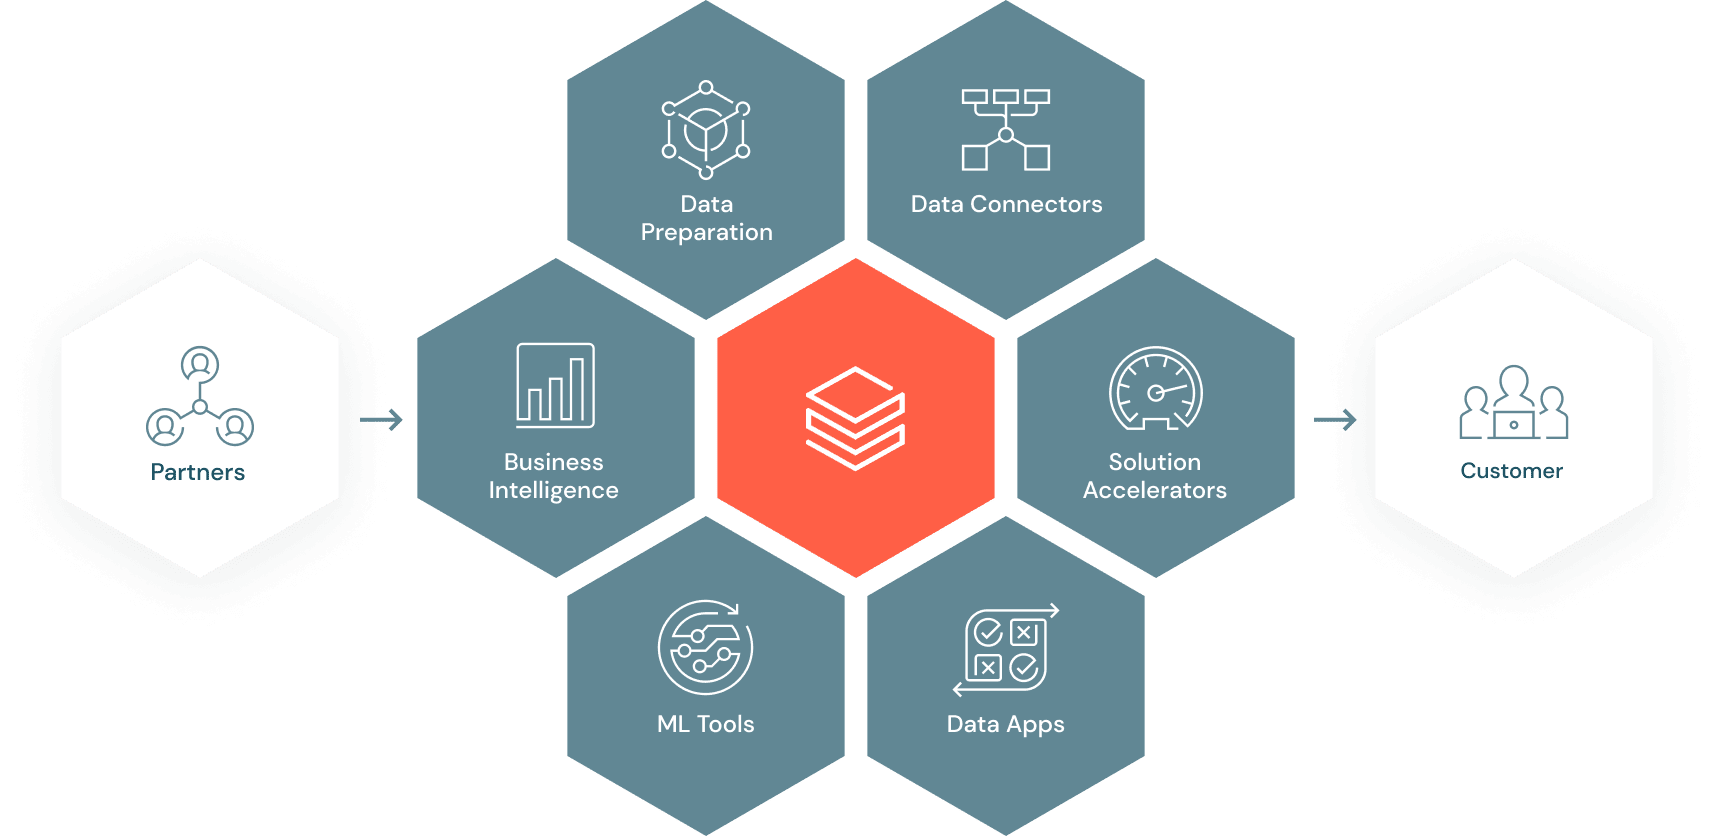
Integrate your lakehouse
Connect your data and AI tools to the lakehouse
Discover validated data and AI solutions for new use cases
Set up in a few clicks with pre-built integrations
Get started as a partner
Databricks partners are uniquely positioned to deliver faster analytics insights for customers. Take advantage of Databricks’ development and partner resources to grow alongside our open, cloud-based platform.
Become a partner“Building on our longtime partnership, Partner Connect enables us to design an integrated experience between our companies and customers. With Partner Connect, we’re delivering a streamlined experience that makes it easier than ever for the thousands of Databricks customers, whether they use Fivetran today or discover us through Partner Connect, to unlock insights in their data, discover more analytics use cases, and get value from their lakehouse faster by easily connecting hundreds of data sources to their lakehouse.”
— George Fraser, CEO at Fivetran
![]()
Demos
Video transcripts
Fivetran demo
Connect to Fivetran from Databricks to simplify the data acquisition and maintenance journey. Take advantage of Fivetran’s fully managed connectors to hundreds of data sources. Fivetran also supports change data capture for data sources.
Click to expand →
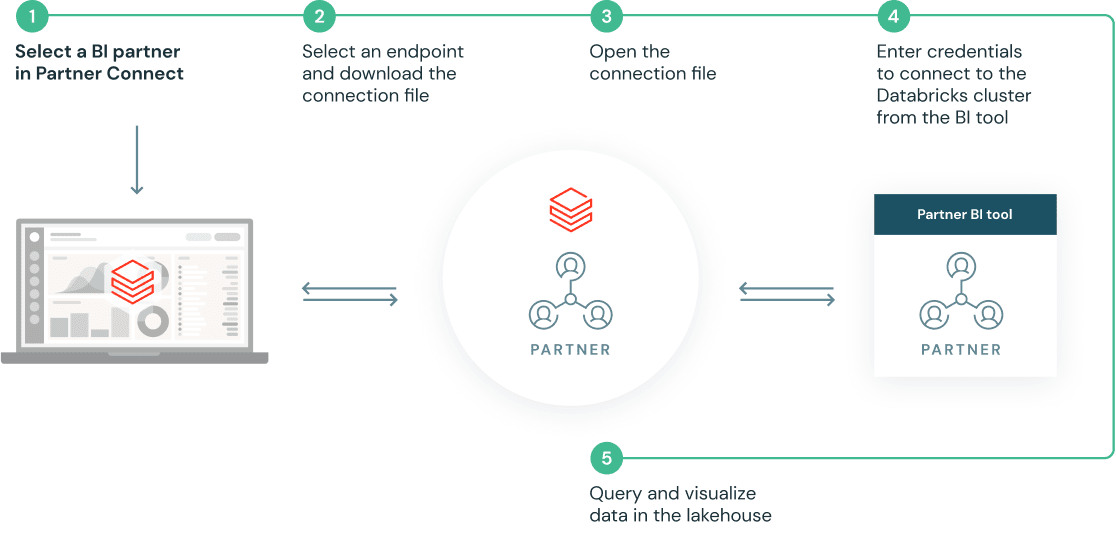
Users can now discover and connect to Fivetran with a few clicks in Partner Connect
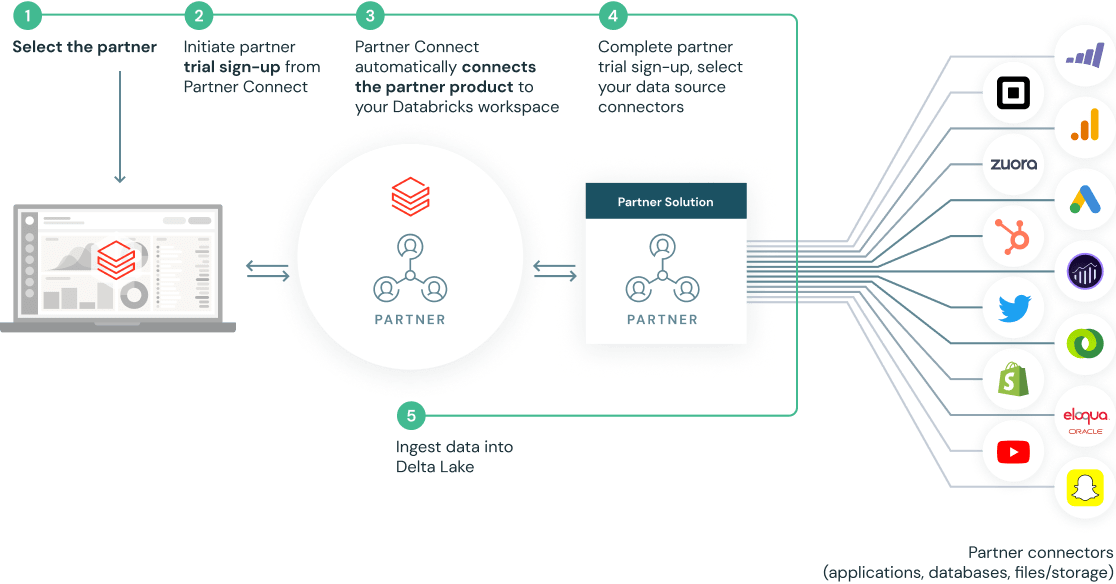
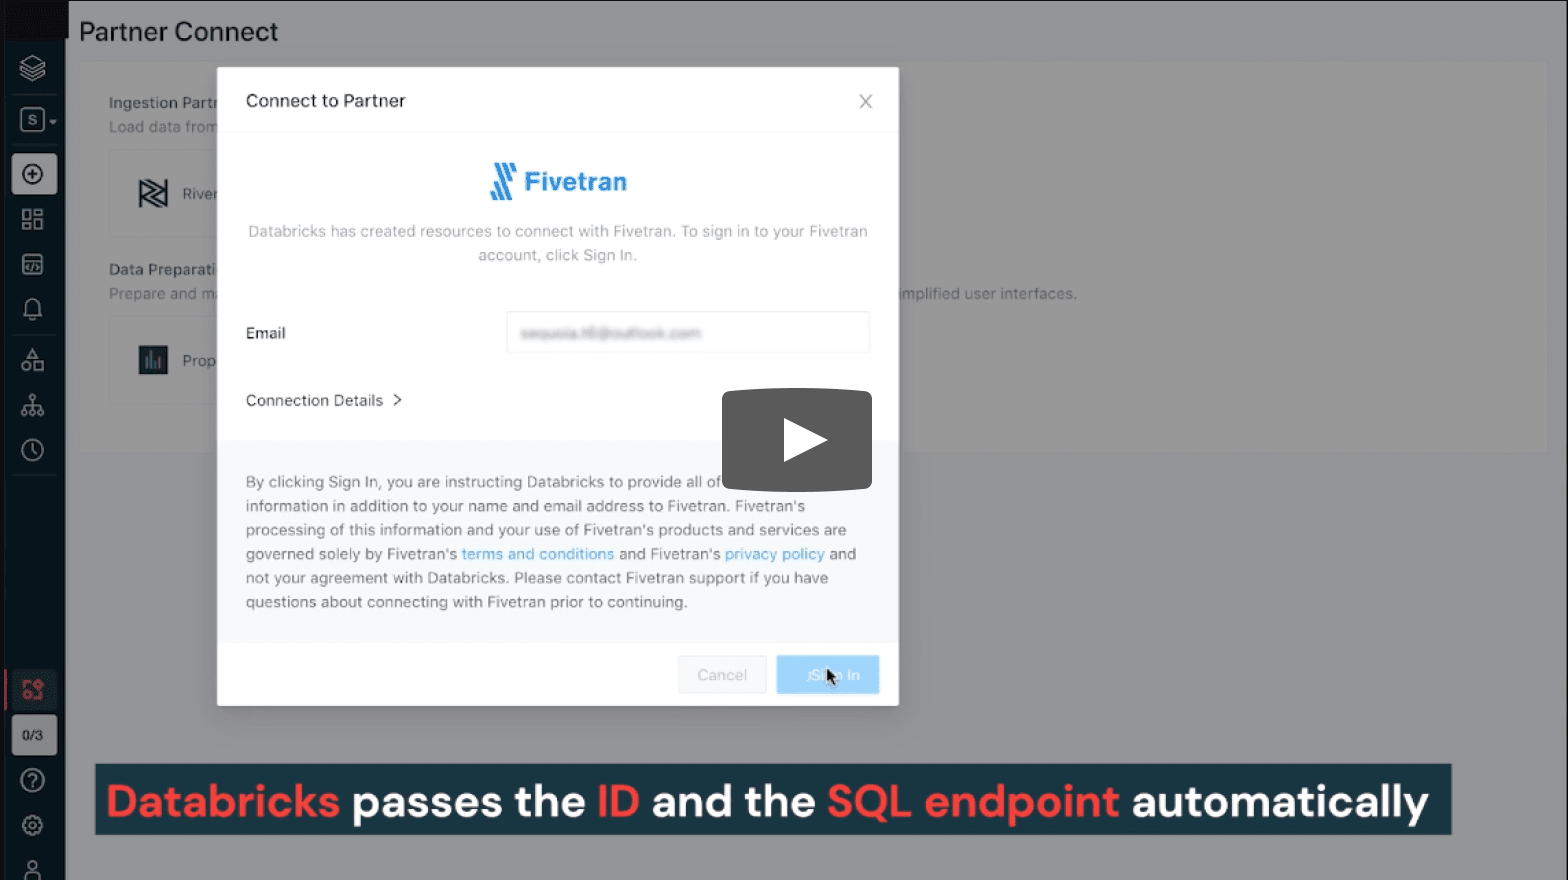
Clicking into Fivetran in Partner Connect starts an automated workflow between the two products where:
– Databricks automatically provisions a SQL Endpoint and associated credentials for Fivetran to interact with, with best practices baked into the configuration of Endpoint.
– Databricks passes the user’s identity and the SQL endpoint configuration to Fivetran automatically via a secure API
We are then redirected to Fivetran’s product to either sign up for a Fivetran trial or to login to Fivetran if we are an existing user. Fivetran automatically setups a trial account.
Fivetran recognizes this is a user who came from Databricks partner connect and automatically creates a Databricks destination that is configured to ingest into Delta via the SQL Endpoint that was auto-configured by Partner Connect (it would be helpful to emphasize this by pausing video & zooming in or highlighting the “Databricks Partner – demo_cloud” icon at the top left to emphasize the automated Databricks destination that was setup)
With the Databricks Delta destination already setup the user now chooses which source they want to ingest from – we will use Salesforce as a source (note the user is free to choose any of the hundreds of sources that Fivetran supports). The user authenticates to the Salesforce source, chooses the Salesforce objects they want to ingest into Databricks Delta (in this case the Acccount & Contact objects) and starts the Initial Sync
By clicking on logs we can see that Fivetran is using APIs to read data from Salesforce and is then ingesting that data into Databricks Delta via the SQL endpoint that was automatically stood up
The synch frequency from Salesforce to Databricks Delta can also be configured from Fivetran
If we click on Destination, we can see the details of the SQL endpoint configuration that was automatically created as a result of coming into Fivetran via Databricks Partner Connect – this automation has saved the user dozens of manual steps & copying/pasting of configuration they would have had to do if they manually setup the connection. It also protects the user from making any unintentional configuration errors and spending time debugging those errors
Coming back into the Databricks UI, we can see the SQL Endpoint that was automatically created by Partner Connect for Fivetran.
Now that the Salesforce data is seamlessly flowing in from Fivetran to Databricks Delta via this SQL Endpoint, we can view the ingested Delta tables in the Databricks Data Explorer
We can now query these Salesforce tables via SQL queries and analyze the data as it flows in from Fivetran for downstream BI analytics and blending with other datasets in the Lakehouse
Rivery demo
Connect to Rivery from Databricks to simplify the data journey from ingestion to transformation and delivery into Delta Lake for your entire organization. Take advantage of Rivery’s pre-built connectors to 150+ data sources that also support change data capture.
Click to expand →
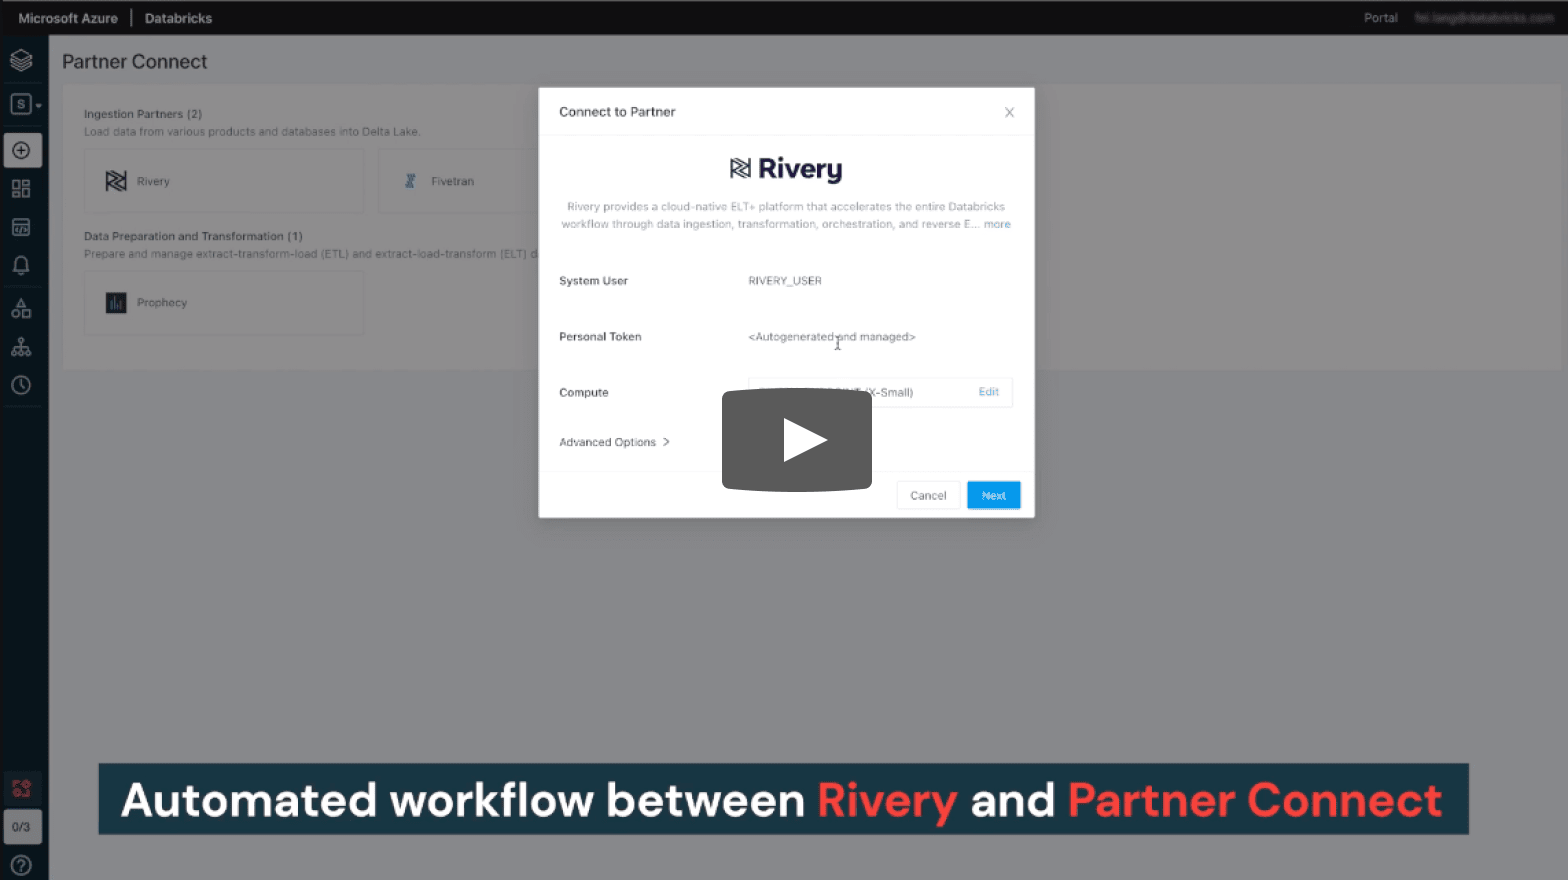
Users can now discover and connect to Rivery with a few clicks in Partner Connect
Clicking into Rivery in Partner Connect starts an automated workflow between the two products where:
– Databricks automatically provisions a SQL Endpoint and associated credentials for Rivery to interact with, with best practices baked into the configuration of Endpoint.
– Databricks passes the user’s identity and the SQL endpoint configuration to Rivery automatically via a secure API
We are then redirected to Rivery’s product console to either sign up for a Rivery trial or to login to Rivery if we are an existing user. Rivery automatically sets up a trial account.
Now we are ready to leverage Rivery’s native data source connectors to load data into Delta Lake.
Rivery recognizes this is a user who came from Databricks partner connect and automatically creates a Databricks destination that is configured to ingest into Delta via the SQL Endpoint that was auto-configured by Partner Connect
Now, go to Connections. It includes connections of data sources and targets. We have one target connection there which is Databricks SQL.
With the Databricks Delta destination already set up the user now chooses which source they want to ingest from – we will use Salesforce CRM as a source (note the user is free to choose 150+ pre-built data source connectors that Rivery supports). The user authenticates to the Salesforce CRM source, save the connection after it passes the test. It shows up in the Connections list.
We click “Create New River” and select “Source to Target” to start the data ingestion.
– Choose Salesforce CRM as our data source.It automatically populates the Salesforce connection that we setup earlier.
– For ingestion configuration, you can choose to load multiple tables simultaneously or only load one table from Salesforce. In this demo, we only select one table which is the “Account” table. Save it.
– On the “Target”. For the ingestion to the already-set Databricks Delta destination, a user can enter an existing database name on the Databricks side or create a new database.
We enter our own database name and add table prefix. And choose “Overwrite” as default ingestion mode.
– Save and click the “Run” button to start the ingestion workflow.
Once ingestion has completed, we can come back the Databricks UI to view the ingested Delta tables in the Databricks SQL Data Explorer
We can see the schema, sample data as well as other detailed information of this table. Easy and straightforward.
We can now query these Salesforce tables via SQL queries and analyze the data as it flows in from Rivery for downstream BI analytics and blending with other datasets in the Lakehouse
Prophecy demo
Connect to Prophecy, a low-code data engineering product, on Databricks with a single click. Interactively build and deploy Apache Spark™ and Delta pipelines using a visual drag-and-drop interface on Databricks clusters.
Click to expand →
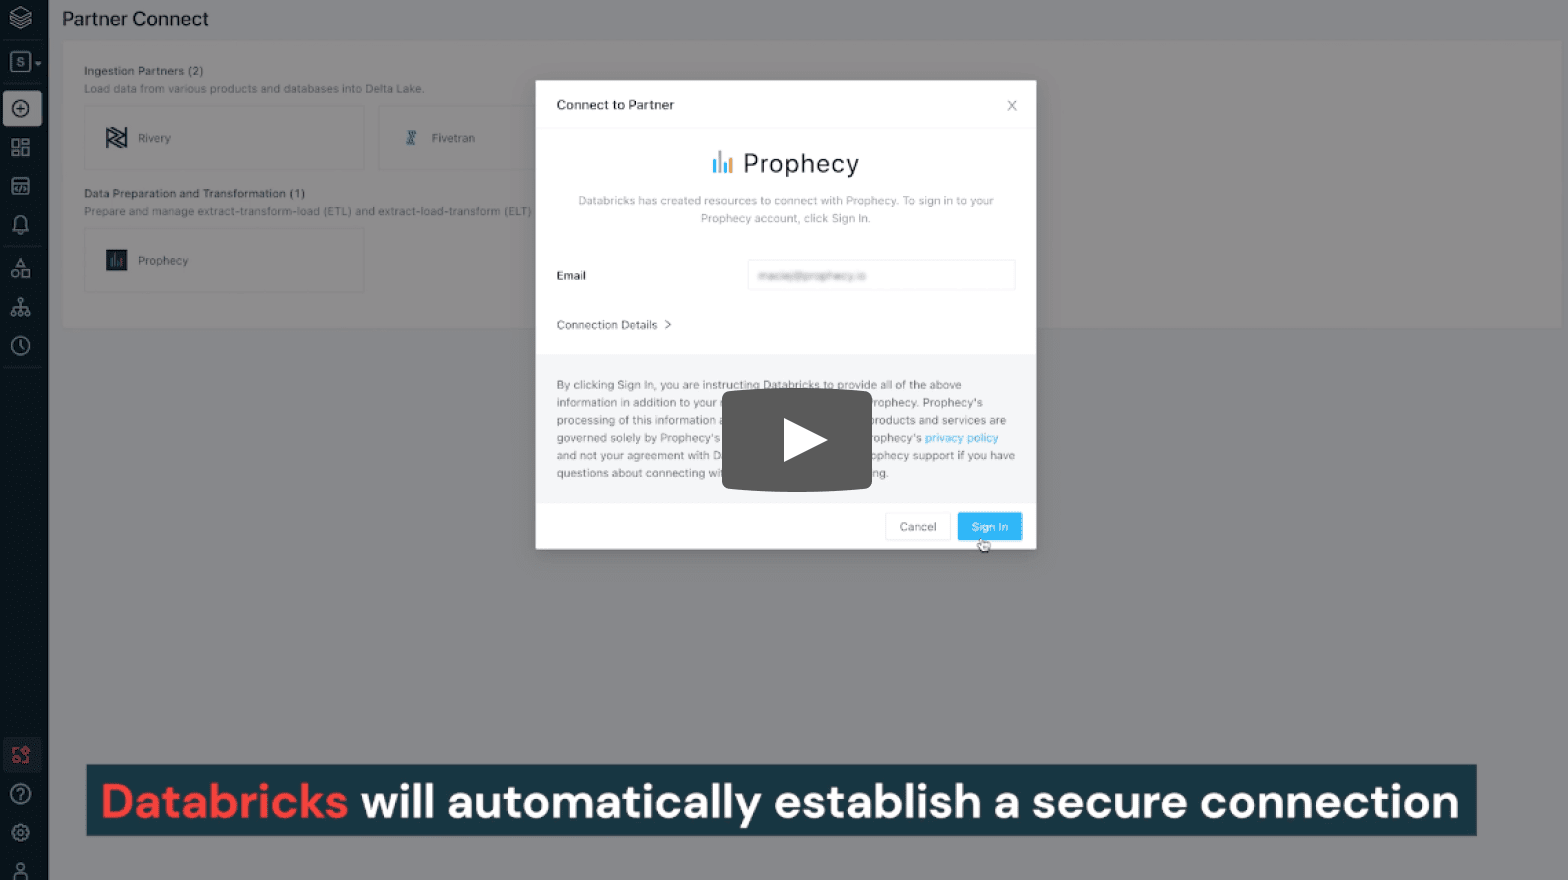
– From here, open the partner connect page and choose Prophecy to sign in.
– When creating a Prophecy account, Databricks will automatically establish a secure connection to run your pipelines directly on your workspace.
With your email credentials being passed along, you only have to choose a new password to sign up for Prophecy.
Now that you have signed into Prophecy, let’s see how easy it is to develop and run your Spark data pipelines.
Let’s choose one of the “get started” example pipelines and open the workflow.
This shows a visual canvas on which we can start building our pipeline.
Let’s start by spinning up a new Databricks cluster.
Now that our cluster has spun up, with just a single click we can go to the Databricks interface and see our cluster on your workspace.
Coming back to the Prophecy UI, let’s explore our pipeline. Here we are reading two data sources of our ‘Customers’ and ‘Orders’ , joining them together…
…. and aggregating them by summing up the amounts column.
Later, we are sorting the data and writing it directly into a Delta table
With Prophecy, we can directly run our workflow with just a single click to see the data after each step
We can see our ‘Customer’ data, ‘Orders’ data, data joined together….
…..the aggregated field with the summed amounts…..
.. and finally, our sorted data that is written to our target Delta table
Now, let’s modify our pipeline by cleaning some of the fields
To do that, we can just drag and drop a new ‘Gem’ called ‘Reformat’…..
… connect it within our existing pipeline….
…. and choose the columns. We can add a new column called ‘full name’, concatenate our first and last name, and add a cleaned up amount column that will have the rounded up value.
Let’s also rename this Gem ‘Cleanup’.
With that, we can directly our workflow and explore the data directly after the cleanup column.
As you see, we have very easily added a Cleanup step to our pipeline.
But Prophecy is not just a visual editor. Behind the scenes, everything is being saved as a high quality Spark code that you can edit.
Additionally, Prophecy allows you to follow the best software engineering practices by directly storing the code on your Git.
Here, we can see our workflow with the latest changes directly as Scala code on Git.
Take advantage of Databricks’ development and partner resources to grow alongside our open, cloud-based platform.